

In histological studies and neuroscience research, staining techniques are essential for visualizing cellular structures and proteins within tissue samples. Two widely used methods for staining are on-slide and free-floating staining. While both methods are effective, they differ in approach, advantages, and limitations. Understanding the differences between these techniques can help researchers select the best method for their specific experimental needs.
On-Slide Staining: Method, Advantages, and Disadvantages
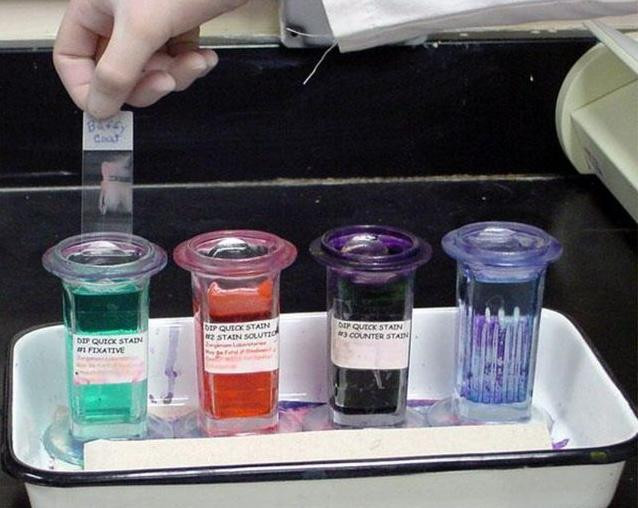
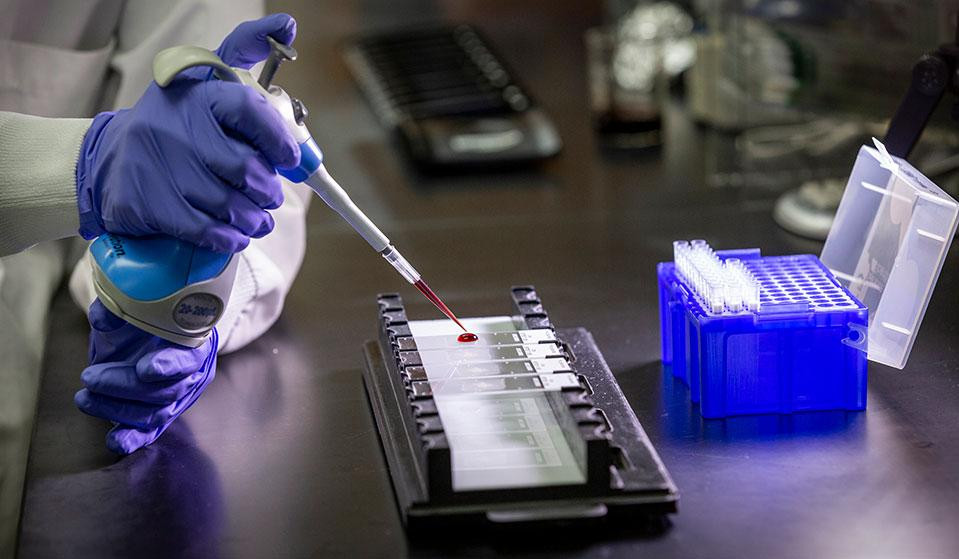
On-slide staining refers to the process where tissue sections are mounted directly onto glass slides before being stained. This method is commonly used for paraffin-embedded or cryostat-sectioned tissues. There are several methods to then stain slides, either by automated machines like tissue processors (Figure 1) or manually done by hand (Figure 2).

Figure 1: Automated tissue staining using a tissue processor. Tissue sections mounted onto glass slides are systematically dipped by the machine into a sequence of dyes, buffers, and solutions, ensuring consistent and high-throughput staining across samples.
Figure 2: Manual tissue staining. Tissue sections on glass slides are carefully immersed by hand into a series of staining solutions, requiring precision and attention to detail to achieve consistent staining outcomes.
Method:
- Tissue sections are cut and mounted onto glass slides.
- Sections are allowed to adhere to the slides, often using heat or an adhesive coating.
- The staining protocol, such as immunohistochemistry (IHC) or hematoxylin and eosin (H&E) staining, is applied while the sections remain affixed to the slides.
- After staining, the sections are dehydrated and coverslipped for microscopic observation.
Advantages:
- Ease of handling: Tissue remains firmly attached to the slide throughout the staining process, reducing the risk of tissue damage or loss.
- Faster workflow: Staining directly on slides allows for a more streamlined workflow, particularly when working with multiple samples or high-throughput staining.
- Compatibility with imaging systems: Since tissues are already mounted on slides, on-slide staining is ideal for immediate microscopic analysis and digital scanning, saving time during post-staining procedures.
- Less reagent use: Because the staining process takes place on a confined surface (the slide), less staining reagent is typically required, making it more cost-effective for high-volume staining.
Disadvantages:
- Limited antibody penetration: In thicker sections, antibody or stain penetration can be hindered due to the fixed and adhered tissue surface, reducing staining intensity and uniformity, particularly for large or dense tissue samples.
- Risk of tissue folding or wrinkling: During the mounting process, tissue sections can sometimes fold or wrinkle, which can negatively impact staining quality and consistency.
- Reduced staining flexibility: On-slide staining is less flexible than free-floating staining because tissue samples cannot be repositioned or manipulated easily once mounted. This limits the ability to ensure even coverage of the stain.
- Smaller tissue size: On-slide staining is generally better suited for smaller or thinner tissue sections, such as those generated by cryostat or paraffin embedding. It can be challenging for larger samples or thick sections.
Free-Floating Staining: Method, Advantages, and Disadvantages
Free-floating staining involves immersing unmounted tissue sections into a staining solution. This method is commonly used for thicker sections or delicate tissues, such as those prepared with a vibrating microtome (vibratome). Sectioned tissue slices are kept typically in well plates (Figure 3).
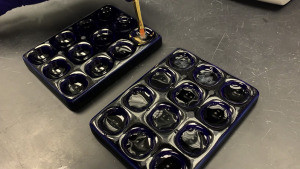
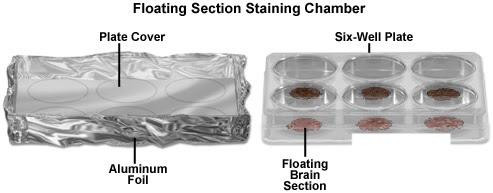
Figure 3. Left image shows tissue sections floating in a buffer solution within a well plate. Right image displays floating brain sections in a well plate, which can be covered with aluminum foil during the staining process when fluorescent antibodies are used to protect against light exposure.
Method:
- Tissue sections are cut and placed in a solution (e.g., a buffer or staining reagent) in a well or container.
- Staining reagents, antibodies, or dyes are applied to the tissue, where they can freely move and penetrate all sides of the section.
- After staining, tissue sections are mounted onto slides for imaging and analysis.
Advantages:
- Enhanced staining penetration: Because the tissue is free-floating, reagents can easily penetrate the tissue from all sides, leading to more uniform staining, especially for thicker samples.
- Better for large or delicate tissues: Free-floating staining is well-suited for large or fragile samples (e.g., brain slices) that may fold or tear during slide mounting.
- Flexible handling: Tissue sections can be manipulated during staining, allowing researchers to ensure even staining across the entire sample.
Ideal for thicker sections: Free-floating staining works particularly well for thick sections, such as those generated by vibratomes, where maintaining tissue integrity is important.
Disadvantages:
More time-consuming: The free-floating process requires additional steps for handling, transferring, and mounting the tissue after staining, making the workflow longer than on-slide staining.
Tissue loss or damage: There is a higher risk of tissue sections becoming lost or damaged during transfers between solutions, especially if the tissue is fragile or not handled with care.
Increased reagent use: Because free-floating staining typically requires immersing tissues in larger volumes of staining reagents, it can be less cost-effective when compared to on-slide staining.
Mounting difficulty: After free-floating staining, transferring the tissue sections onto slides can be challenging, especially for delicate or large sections, which may tear or fold during the process.
| Criteria | On-Slide Staining | Free-Floating Staining |
| Staining Penetration | Limited for thicker tissues | Excellent for thick/large tissues |
| Tissue Handling | Fixed on slides, easy to handle | More fragile, requires careful manipulation |
| Workflow Speed | Faster, more streamlined | Longer, more manual handling required |
| Reagent Use | Less reagent required | More reagent required |
| Compatibility | Suited for paraffin-embedded and thin sections | Best for thick, delicate sections |
| Risk of Damage | Low risk of loss, but may fold or wrinkle | Higher risk of tissue loss or damage |
Choosing the Right Staining Method for Your Research
Selecting the appropriate staining method depends on the type of tissue, the specific staining protocol, and the desired experimental outcome. On-slide staining is ideal for high-throughput workflows and smaller, thinner samples, while free-floating staining is better suited for thicker sections and when uniform staining throughout the tissue is essential. Researchers should weigh the pros and cons of each technique to determine which method best fits their needs.
Tips for Optimizing Your Staining Process
On-Slide Staining:
- Ensure proper tissue adhesion to the slide using a coating or heat drying to prevent tissue loss during staining.
- Use thin tissue sections to improve stain penetration and clarity.
Free-Floating Staining:
- Handle tissue gently with fine-tipped forceps to avoid tears.
- Use mesh-bottom well plates or baskets for easier manipulation and fewer tissue transfers.
- Ensure adequate incubation time for staining reagents to fully penetrate thick sections.
At Precisionary Instruments, we specialize in tools like vibratomes and microtomes, designed to help you achieve the best tissue sections for both on-slide and free-floating staining. Whether you’re working with delicate brain slices or robust samples, our instruments are engineered to support precise, reproducible results. Contact us for expert advice or product recommendations to improve your staining protocols and tissue sectioning techniques.